
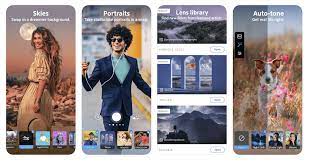
Good pictures rarely happen by accident. In 2027, most people take their photos on a phone, and a good photo editing app can turn an ordinary shot into one worth keeping, sharing, or printing. You do not need expensive equipment or professional training to get better results. You need a clear idea of what you want to improve, a few reliable tools, and a simple routine you can repeat every time you edit. This guide explains how to use photo editing apps in a practical way, so your pictures look natural, clear, and polished without looking overdone.
Start by deciding what the picture needs. Look at it for a few seconds before you touch any control. Is it too dark or too bright? Is the horizon tilted? Is the main subject lost in a busy background? Does the colour look dull or too strong? When you name the problem first, you avoid random changes that make the picture worse. Keep the original file safe as well. Most editing apps let you save a copy or undo changes, so use that option and compare the edited version with the original before you finish.
Choose an Editing App That Fits Your Needs in 2027
There are many photo editing apps in 2027, from simple free apps to more advanced ones with layers, masks, and artificial intelligence tools. A beginner does not need the most advanced app. Choose one that opens quickly, has clear controls for brightness, contrast, colour, cropping, and sharpening, and lets you save pictures in good quality. If you plan to edit portraits, look for gentle skin smoothing and eye brightening tools. If you enjoy landscapes, look for tools that adjust the sky, shadows, and detail separately. Try two or three apps with the same photo and keep the one that feels easiest to use, because a familiar app will save you time and help you learn faster.
Fix Light, Colour, and Sharpness First
Light is the most important part of a good picture. If a photo is too dark, raise the brightness or exposure a little at a time. If the bright areas look washed out, lower the highlights. If the shadows hide detail, lift them gently. Small changes work better than large ones. Move a slider a little, pause, and look at the whole picture again. The goal is to make the subject clear without making the picture look flat or artificial. A picture with balanced light usually needs less colour correction afterwards.
Colour comes next. If a photo looks yellow, blue, or grey, adjust the white balance or temperature until white objects look white and skin looks natural. Then check saturation, which controls how strong the colours appear. A small increase can make a dull photo look lively, but too much saturation makes grass look unreal and skin look orange. Add a small amount of sharpening to bring out detail in eyes, hair, fabric, and text. Too much sharpening creates rough edges and noise, so stop as soon as the detail looks clear.
Crop, Straighten, and Remove Distractions
Cropping is one of the fastest ways to improve a picture. Remove empty space, cut out a distracting object at the edge, and place the main subject where it draws the eye. Many apps show a grid that divides the picture into nine parts. Try placing the subject near one of the lines or crossings instead of always in the centre. Straighten the picture too, because a tilted horizon in a landscape or a leaning building can distract from an otherwise good photo. Use the rotation tool until lines that should be level look level. Many apps in 2027 also include tools to remove small distractions, such as a spot or a stray object. Use these carefully and only for small changes, because removing a large object can leave a blurred patch.
Use Filters and Presets With Care
Filters and presets can give your pictures a consistent style and save time, but they should support your photo, not hide it. Choose a filter that suits the mood of the picture. A warm filter may suit a sunset, while a clean, light filter may suit a family photo. After applying a filter, reduce its strength if the app allows it. A filter at full strength often changes skin tones and colours too much, so try the same filter at half strength and compare the two versions. You will often find that the softer version looks better and more natural. It also helps to use the same style for a set of pictures from one trip or one event, so the collection looks organised when you share it.
Save, Organise, and Share Your Edited Pictures
When you are happy with an edit, save the picture in the highest quality your app offers. Low quality saving can make a good edit look soft, especially if you print the picture or view it on a larger screen. Keep a clear system for your files. Create folders by date, event, or topic, and give important pictures a clear name. Back up your best pictures to a cloud service or another device, so a lost or damaged phone does not mean losing your work. Before sharing, check the picture on a different screen if you can, and look at the details at full size for rough edges or strange colours. A short pause before sharing often helps you notice a small problem you missed while editing.
Common Mistakes to Avoid
The most common mistake is editing too much. Heavy filters, very bright colours, and strong smoothing can make a picture look fake. Another mistake is editing only one part of the picture and ignoring the rest, so check the edges, the background, and the corners before you finish. A third mistake is forgetting the original purpose of the photo. A picture for a family album does not need the same style as a picture for a creative project. Keep the people, place, and story in mind, and let the editing support them. With regular practice, photo editing becomes faster and more natural. Edit a few pictures each week, try one new tool at a time, and keep notes about the settings that work well for you. In 2027, photo editing apps offer more help than ever before, but the best results still come from a careful eye and a light touch.